December 28, 2014

DIY Chalk Painted Dresser...A Review

I can't believe it's been three years since I painted my first dresser, using DIY Chalk Paint.  Three years and not only do we still have this dresser, it is one of the most used pieces in our home.  See back then, I had no idea how much I would love taking something ugly, and unloved, and turning it into something beautiful for our home.  At the time, we just needed a dresser for our bedroom and didn't have a lot to invest in it.

Chalk Painted Dresser

And today I still use the same DIY Chalk Paint method on most everything I paint.  It's proven to be a great paint medium (and a ton cheaper than store bought chalk paint).  It has never failed.

OK, so here is a the original BEFORE....


Not bad.....if you like that sort of thing.  It wasn't MY sort of thing.  But the details are so beautiful.  To be honest, I haven't come across a dresser like this since.  Not for the price anyways.

Like I said, we needed something extra for our bedroom. When my husband and I were first dating and moved in together, we needed more storage. We have since purchased our own home but we still have this dresser.  

Here is the AFTER in our old apartment (bad lighting and decor.)...

DIY Chalk Painted Dresser After

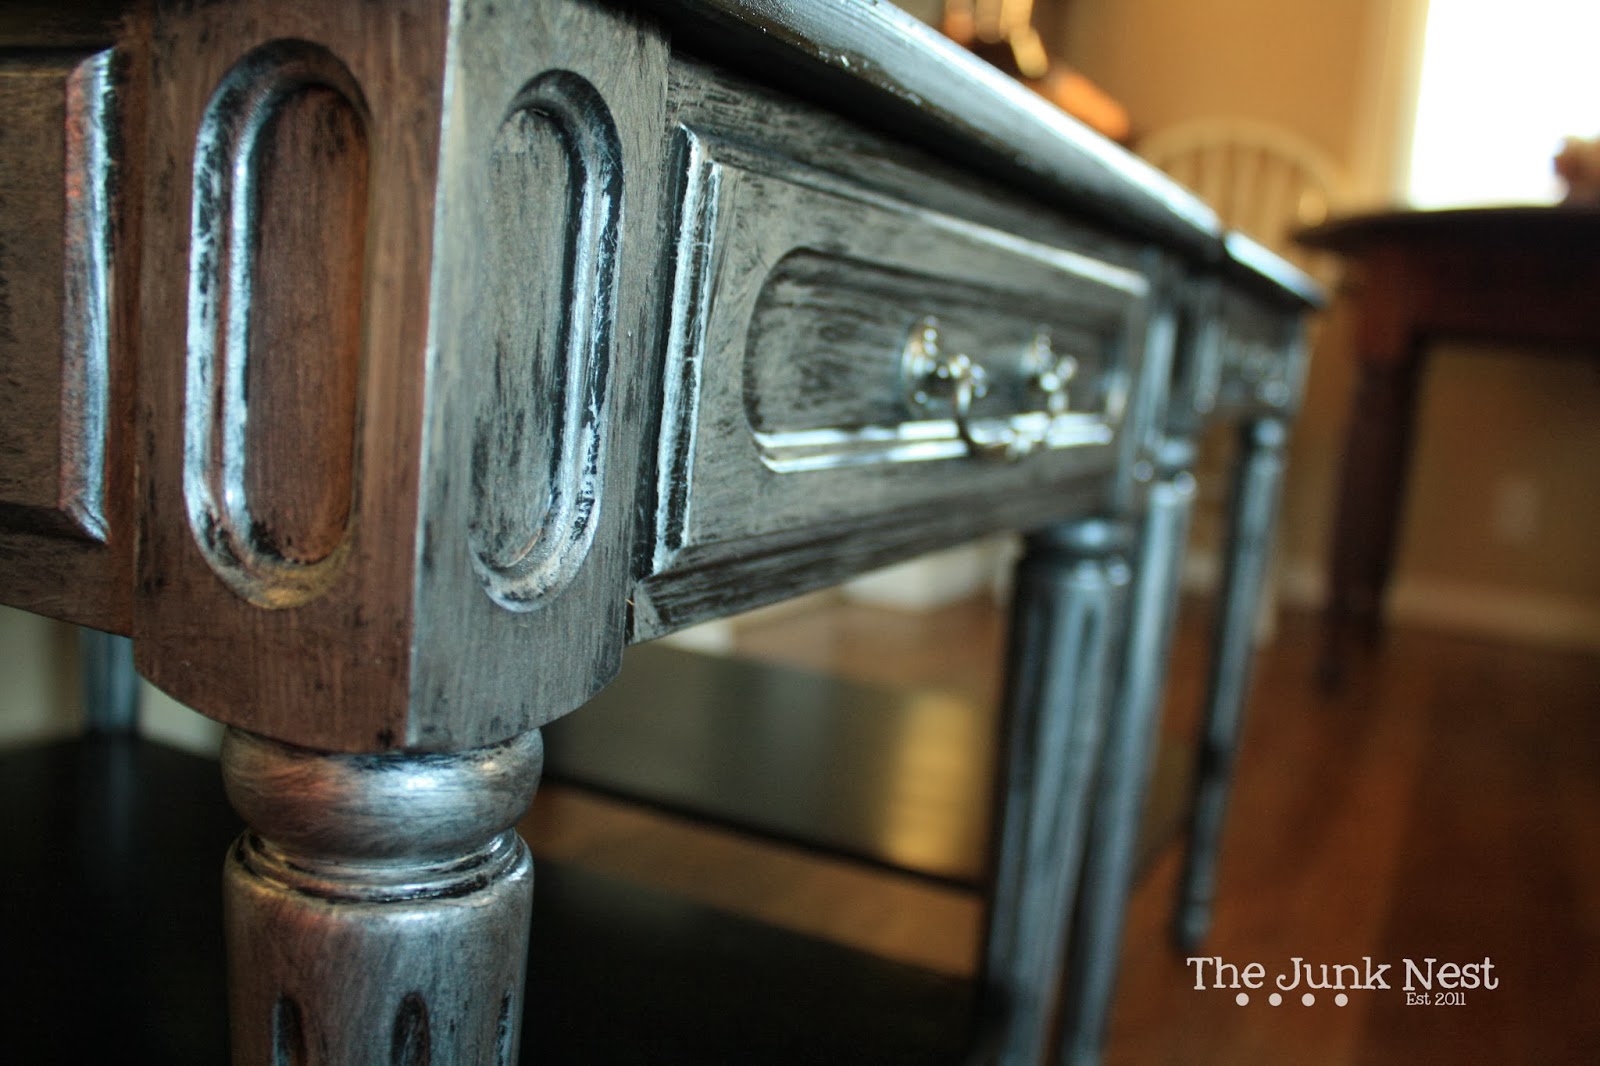
And the AFTER AFTER in our own home, three years later.  No touch-ups have been done and it still looks great  :)  Maybe better.

DIY Chalk Painted Dresser

 Stay tuned for another reveal on our master bedroom makeover.....on a budget of course!


Sharing At....
That DIY Show Off

December 22, 2014

DIY Book Page Ornaments

Happy Monday friends!  I hope you all had a great weekend.  Just a couple more days and Christmas will be here!  Are you excited like me?  This year, I have this week off of work so I am trying to get a ton of things done around the house.  BUT I wanted to share a DIY christmas project before Christmas is over!

DIY Book Page Ornaments

I'm in love with ANYTHING that is crafted from book pages.  If you come to my house, you will see that in almost any room you are in.  Why would I not incorporate it into Christmas as well?

DIY Book Page Ornaments

One year we didn't have an actual star for our tree, and I made a topper out of book pages....but....I broke down and bought a real star.  It just isn't the same without one.

Christmas Tree DIY Ornaments

And there you have it! DIY Book Page Ornaments :)  
I hope you all have a happy and safe Christmas!

November 24, 2014

I Painted Our Bathroom Floor....CHEVRON!

I painted our bathroom floor......CHEVRON. And I love it. It's so unique and a real conversation piece.  Not only was it under $100, but it was easy too!
Now, we could have went out and bought new tile and tiled the floor.  That would have been a really good choice.  Probably a better choice all around, but I wanted to do something different.  Something that might have a slight WOW factor. And something a bit less expensive.
Chevron Painted Floor
It turned out better than I expected, considering I had never painted a bathroom floor OR created a chevron pattern ...  in my life.
I did a lot of research online, looked at a ton of DIY painted floors, read about how it was done...and then did it my own way. haha.  Everything I was reading advised to use floor paint.  And nothing mentioned a protective clear coat.  I paint furniture and other things, and I know that a final clear protective coat is a MUST for high-use areas. 
The before picture....ah.  It's not the worst bathroom.  But keep in mind I'm working with the floors and walls that were in the house when we bought it.  We replaced the vanity, toilet, and tub but  I had wanted to keep the walls because I thought they had potential and the floor was ok to live with for awhile.  Fast forward a year and a half and I'm ready to get something done with the walls and floors.
So the floor had to be first. Here is what I did....
I roughed the floor up with a sanding block and wiped it down good.  Then I rolled on two coats of white primer and sealer.  Just your basic Kilz...nothing else.  Super easy.
I was already enjoying the transformation.  If I had liked it enough, it could have been left white. 

But I had my heart set on chevron.
I will admit, taping the chevron pattern was the worst part.  I had never tried this and was a bit nervous, but by the end I was declaring myself a chevron professional. 


I applied two coats of regular Behr paint.  NOT floor paint or anything special, just regular paint. 

After the two coats had dried, I took of the tape.  As you can see, some of the white paint pulled up with the tape.  This was the area I had been standing on while painting the strips.  I freaked at first.  But a small roller and more white primer paint fixed it right away.

Chevron Painted Floor

I applied two coats of polyurethane for floors.  This was my biggest mistake because it turns white into yellow. The can says it's CLEAR GLOSS...ha!!!
 I would advise against it unless you are painting your floor other colors and not white.  Although the poly is protecting it really well.  If I could do it all over again, I think I would use a clear lacquer instead.


Sharing At:

October 18, 2014

DIY Painted Coffee Table

Do you have a coffee table that has seen better days?  I did. A few months ago, I painted our old coffee table white and distressed it a bit --- but the end result wasn't all the greatest.  And it just didn't mesh well with the rest of our living room.


It wasn't the worst coffee table in the history of painted coffee tables....


But I wasn't inlove with it --- nope.

So I did what any DIY'er would do.  I fixed it.


I taped off a diamond pattern with painters tape.  And then I sanded all the diamond shapes. This whole project literally took me about 20 minutes.


It's not new, but it will work for awhile.  

September 25, 2014

Blog Problems

I'm posting this in hopes that someone might know how I can fix my blog.  Blogger is of no help. 

I have no idea what happened, but if you are reading this you can see my blog is totally jacked up. Almost all of my photos have disappeared, and every time I log on I get an error message.

I've enjoyed blogging here while I have, but if years of blogging can go down the tubes in an instant with no way of fixing it -- I have to rethink this whole blogger thing.

I mean -- wow -- years of posts just gone and blogger can only say "this is a known problem" try clearing your cache or searching online for a solution?  The laptop I'm using is brand spanking new.  I have not been online enough with it to have my cache clogged to shit.

Grr....

Please help....someone!
(I knew I should've went into the IT profession......)


February 1, 2014

Bathroom Light Fixtures in Metallic Glaze

After using metallic glaze for the first time on a pair of side tables  I sort of wanted to paint everything in my house metallic.  The wall lights in our bathroom are old and outdated.  But they have a neat look to them that we kind of enjoy.  We thought about replacing them, but we thought they might add a little character to the space.

And....they were the perfect little victim's for my metallic glaze craze....

Here is the after.


metallic glaze light
Light


And of course the dreadful before...

Not bad.  I think the metallic glaze helped jazz them up. You cannot tell they were ever gold.


January 18, 2014

Painted Side Tables - Using Metallic Glaze

Hey ya'll!
Guess what I did for the first time? Painted furniture and used a metallic glaze. Yep...I did.
And being this was the first time I had used a glaze, I was extremely nervous.  More nervous then I would have been if these side tables had been my own.  But nope...someone was waiting for them to look amazing when I was done. oh boy...


I painted both of these side tables entirely black and then used a metallic glaze on the body and the legs.  
 
I was a bit skeptical at first, not really knowing how these would turn out, but this will definitely be something I use more frequently in the future. They turned out lovely.