Showing posts with label DIY. Show all posts

December 28, 2014

DIY Chalk Painted Dresser...A Review

I can't believe it's been three years since I painted my first dresser, using DIY Chalk Paint.  Three years and not only do we still have this dresser, it is one of the most used pieces in our home.  See back then, I had no idea how much I would love taking something ugly, and unloved, and turning it into something beautiful for our home.  At the time, we just needed a dresser for our bedroom and didn't have a lot to invest in it.

Chalk Painted Dresser

And today I still use the same DIY Chalk Paint method on most everything I paint.  It's proven to be a great paint medium (and a ton cheaper than store bought chalk paint).  It has never failed.

OK, so here is a the original BEFORE....


Not bad.....if you like that sort of thing.  It wasn't MY sort of thing.  But the details are so beautiful.  To be honest, I haven't come across a dresser like this since.  Not for the price anyways.

Like I said, we needed something extra for our bedroom. When my husband and I were first dating and moved in together, we needed more storage. We have since purchased our own home but we still have this dresser.  

Here is the AFTER in our old apartment (bad lighting and decor.)...

DIY Chalk Painted Dresser After

And the AFTER AFTER in our own home, three years later.  No touch-ups have been done and it still looks great  :)  Maybe better.

DIY Chalk Painted Dresser

 Stay tuned for another reveal on our master bedroom makeover.....on a budget of course!


Sharing At....
That DIY Show Off

December 22, 2014

DIY Book Page Ornaments

Happy Monday friends!  I hope you all had a great weekend.  Just a couple more days and Christmas will be here!  Are you excited like me?  This year, I have this week off of work so I am trying to get a ton of things done around the house.  BUT I wanted to share a DIY christmas project before Christmas is over!

DIY Book Page Ornaments

I'm in love with ANYTHING that is crafted from book pages.  If you come to my house, you will see that in almost any room you are in.  Why would I not incorporate it into Christmas as well?

DIY Book Page Ornaments

One year we didn't have an actual star for our tree, and I made a topper out of book pages....but....I broke down and bought a real star.  It just isn't the same without one.

Christmas Tree DIY Ornaments

And there you have it! DIY Book Page Ornaments :)  
I hope you all have a happy and safe Christmas!

November 24, 2014

I Painted Our Bathroom Floor....CHEVRON!

I painted our bathroom floor......CHEVRON. And I love it. It's so unique and a real conversation piece.  Not only was it under $100, but it was easy too!
Now, we could have went out and bought new tile and tiled the floor.  That would have been a really good choice.  Probably a better choice all around, but I wanted to do something different.  Something that might have a slight WOW factor. And something a bit less expensive.
Chevron Painted Floor
It turned out better than I expected, considering I had never painted a bathroom floor OR created a chevron pattern ...  in my life.
I did a lot of research online, looked at a ton of DIY painted floors, read about how it was done...and then did it my own way. haha.  Everything I was reading advised to use floor paint.  And nothing mentioned a protective clear coat.  I paint furniture and other things, and I know that a final clear protective coat is a MUST for high-use areas. 
The before picture....ah.  It's not the worst bathroom.  But keep in mind I'm working with the floors and walls that were in the house when we bought it.  We replaced the vanity, toilet, and tub but  I had wanted to keep the walls because I thought they had potential and the floor was ok to live with for awhile.  Fast forward a year and a half and I'm ready to get something done with the walls and floors.
So the floor had to be first. Here is what I did....
I roughed the floor up with a sanding block and wiped it down good.  Then I rolled on two coats of white primer and sealer.  Just your basic Kilz...nothing else.  Super easy.
I was already enjoying the transformation.  If I had liked it enough, it could have been left white. 

But I had my heart set on chevron.
I will admit, taping the chevron pattern was the worst part.  I had never tried this and was a bit nervous, but by the end I was declaring myself a chevron professional. 


I applied two coats of regular Behr paint.  NOT floor paint or anything special, just regular paint. 

After the two coats had dried, I took of the tape.  As you can see, some of the white paint pulled up with the tape.  This was the area I had been standing on while painting the strips.  I freaked at first.  But a small roller and more white primer paint fixed it right away.

Chevron Painted Floor

I applied two coats of polyurethane for floors.  This was my biggest mistake because it turns white into yellow. The can says it's CLEAR GLOSS...ha!!!
 I would advise against it unless you are painting your floor other colors and not white.  Although the poly is protecting it really well.  If I could do it all over again, I think I would use a clear lacquer instead.


Sharing At:

October 18, 2014

DIY Painted Coffee Table

Do you have a coffee table that has seen better days?  I did. A few months ago, I painted our old coffee table white and distressed it a bit --- but the end result wasn't all the greatest.  And it just didn't mesh well with the rest of our living room.


It wasn't the worst coffee table in the history of painted coffee tables....


But I wasn't inlove with it --- nope.

So I did what any DIY'er would do.  I fixed it.


I taped off a diamond pattern with painters tape.  And then I sanded all the diamond shapes. This whole project literally took me about 20 minutes.


It's not new, but it will work for awhile.  

January 18, 2014

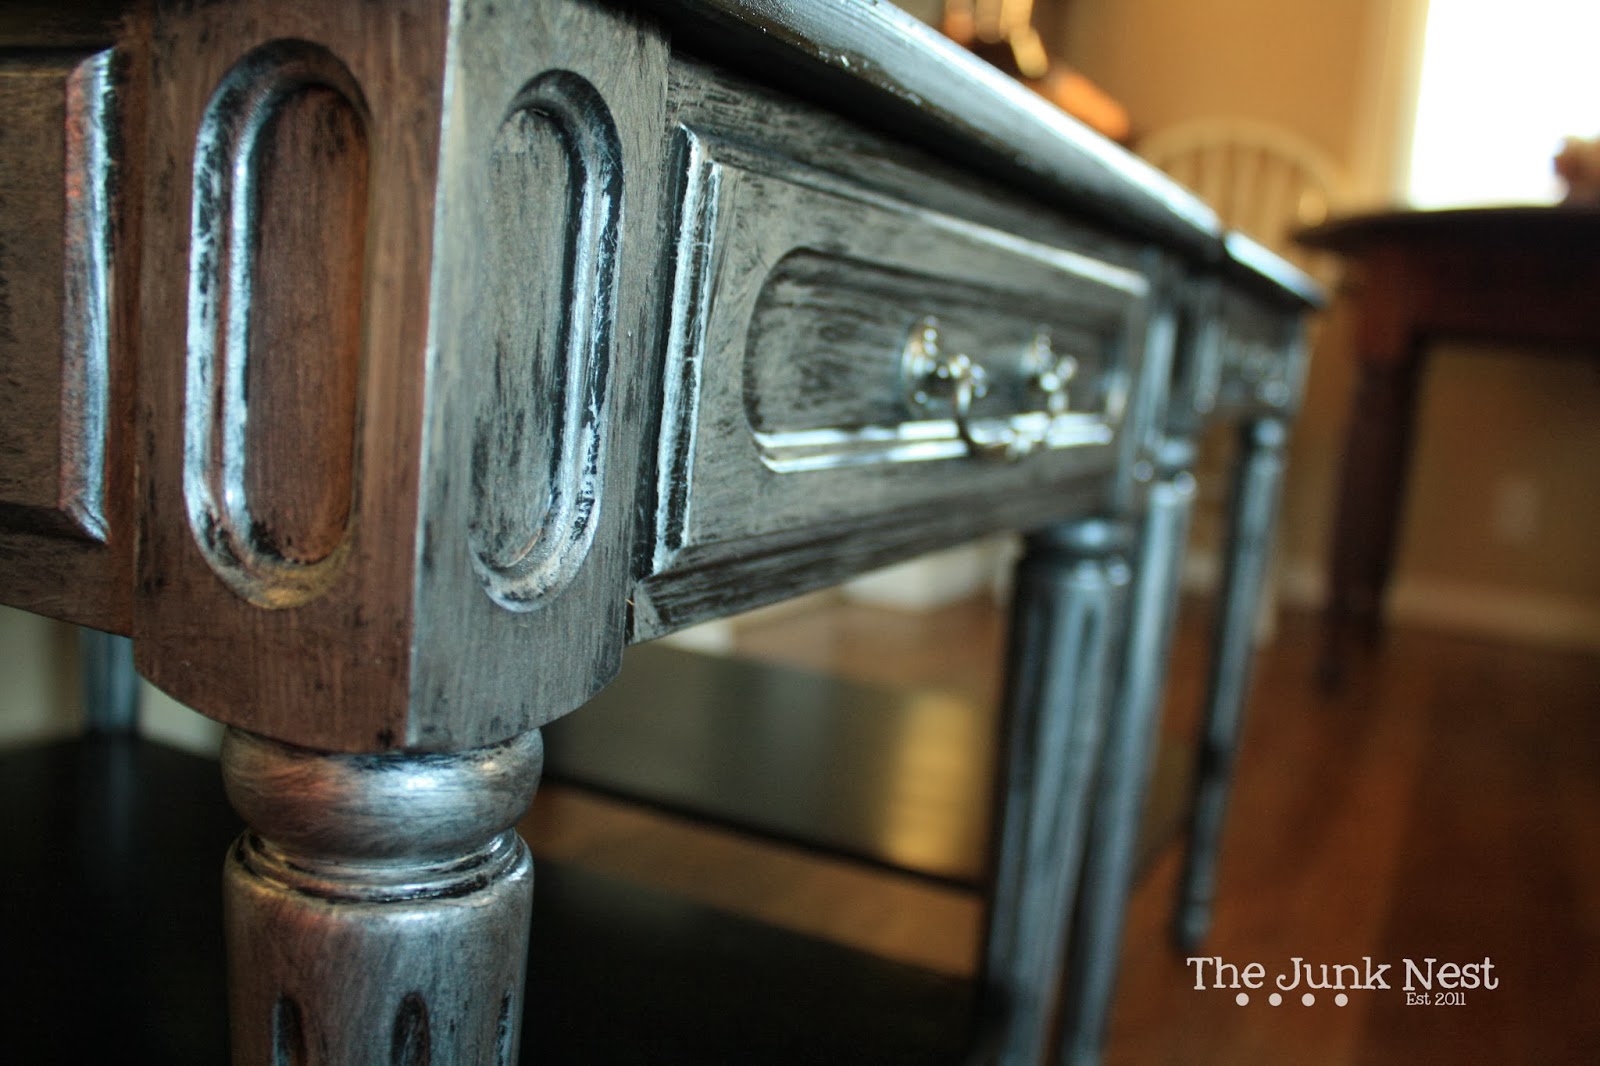
Painted Side Tables - Using Metallic Glaze

Hey ya'll!
Guess what I did for the first time? Painted furniture and used a metallic glaze. Yep...I did.
And being this was the first time I had used a glaze, I was extremely nervous.  More nervous then I would have been if these side tables had been my own.  But nope...someone was waiting for them to look amazing when I was done. oh boy...


I painted both of these side tables entirely black and then used a metallic glaze on the body and the legs.  
 
I was a bit skeptical at first, not really knowing how these would turn out, but this will definitely be something I use more frequently in the future. They turned out lovely.

November 5, 2013

DIY Chalkboard Book Shelf

This little book shelf was actually a mistake.  From the beginning, I had no clue what to do with it.  I almost threw it away. 


But a couple of coats of chalkboard paint on the top and ASCP on the rest, I knew it was the perfect little book shelf for my daughters bedroom.  

October 24, 2013

A Miss Mustard Seed Dresser

This week has gotten away from me.  It's already Thursday -- and I'm not prepared for today at all.  I'd really like to crawl back into bed....but then there's this thing called a job. 
 
Anyhow...Miss Mustard Seed caught my attention big time with this Apron Strings dresser.  I wish I lived closer to her because this would totally be in my house right now....


October 22, 2013

New Craft Room Storage Dresser

Well everyone, I finally finished a piece of furniture for my craft room.  Remember when I found these babies on craigslist a couple weeks ago ? The tall one was "choosen"....hahaha.

Craft Room Storage Dresser


I'm so happy with how this turned out. 

Craft Room Storage Dresser


Craft Room Storage Dresser


Craft Room Storage Dresser


I laid down to take a picture from a different angle and when I focused, I saw....
my little buddy Duncan.  Little guy follows me EVERYWHERE.

Craft Room Storage Dresser


So anyhow...this dresser replaced a plastic storage unit that I had been using for all my craft supplies since I started crafting.  It holds much more than the plastic unit did -- so yay for that!  Plus it makes the room look a bit more "put-together".  

I used an off brand white paint for the top and sides, chalkboard paint for the drawers, and then put a glaze over the top and sides.  I didn't use a protective finish on this.  I didn't need to with the type of use it's going to be getting.

Soon enough, I will do a craft room reveal for you guys.  Stay tuned....

October 19, 2013

The Type of Paint You Should Use On Furniture

Last week I talked about getting a smooth paint finish on furniture.  If you missed that post -- you can get caught up here.   But what type of paint to use is also worth knowing.  When I first started painting furniture, I was unsure of the type of paint I should be using for the best finish.  I've used many different paints and here is a recap of what I've learned!


The Type of Paint To Use on Furniture


The important thing to know is that ANY paint will make your furniture come together a LOT better.  Whether it's name brand paint, off brand paint, or a combination of both. The end result will be similar.  

For example, this black dresser was painted with a Behr paint.  It was $35 a gallon.  I also used a paint sprayer (and added water of course!).  Turned out nice right?

The Type of Paint To Use on Furniture


Then there is the antique white dresser done with my homemade chalk paint.  I combined an off brand primer, off brand paint, WATER, and painted this one by hand.

The Type of Paint To Use on Furniture


The end result was great on both.  The difference?  Price! As I mentioned, the Behr paint was $35 a gallon.  I had actually bought the paint to do the doors in my house and had extra leftover. I would never buy a $35 gallon of paint for furniture projects...shish what were you thinking!

The paint I used on the white dresser was found in the Oops section of Walmart.  I can't remember what I paid for them, but I never pay over $5.00 for Oops paint...so I would say under $5!

What is Oops paint you ask?  It is just what it sounds like.  The paint associate at Walmart...or Home Depot (or whatever store carries paint) mixes the paint wrong or a customer changes their mind.  These stores are just trying to make a buck off of the paint instead of trashing it. I found out about Oops paint online.  When I first set out to purchase some, I just asked the paint associate at the store were it was.  They know exactly what you are asking for.  

Some examples.....

The Type of Paint To Use on Furniture


The Type of Paint To Use on Furniture


The Type of Paint To Use on Furniture


I love all the paints I've ever bought (name brand or off brand) and never had any application issues with any of them.

It is OK to mix different paints together to create your own.  My antique white dresser - as mentioned - was painted with a combination of white primer, a beige color paint, some Plaster of Paris, and of course....water.  It doesn't matter what type of mixture you put together, the end result will look fantastic.  What is really important is what finishing product you use!

I will talk about finishing products next week so make sure you check back to get all the deets.

Have a great weekend everyone!

October 17, 2013

DIY Wood Countertops

Who would have ever thought making your own wood countertops was possible?  I sure didn't until recently when I stumbled upon this awesome DIY tutorial by Gina over at The Shabby Creek Cottage.  She did her own counter-tops and they look fantastic!  Not only that, but it took 30 minutes!


So I thought I would share this with all of you because this is almost too good to be true! Head over to The Shabby Creek Cottage for the total DIY tutorial!


October 15, 2013

DIY Paperback Pumpkin

While looking for fall decor one night, I stumbled across these really cool paper pumpkins on Pinterest.  I was swooning over them immediately.

DIY Book Page Pumpkin


This project took a little more effort to complete than I had thought it would.  It is definitely not one for children due to the use of the exacto knife.  

If you want to know how to make these yourself, Katie from Upcycled Treasures does a great job of explaining.

Linking to these parties...
Savvy Southern Style
The Shabby Creek Cottage
The Crafty Blog Stalker

October 12, 2013

How To Get A Smooth Finish On Painted Furniture

One of my most frequently asked questions  is how I get the finish to look so smooth on my furniture.   I thought today was the perfect day to share my secret with all of you.

How To Get A Smooth Finish On Furniture


Really it's so petty you will probably do one of two things:  1 - say...are you serious? or 2 - laugh. But the secret to getting a smooth painted surface on your furniture is nothing more than ....

Adding water!

How To Get A Smooth Finish On Furniture


I never paint anything without first adding water.   Why would I do this crazy nonesense?  Normal paint tends to be a little thicker, so when you apply it it just sort of
 lays there.   When it is watered down, the paint spreads out after being applied and the brush strokes disappear.   Nifty huh?

 My Old Storage Trunk, Black Beauty Dresser, and Antique White Dresser are just a few projects I've done with watered down paint.

How To Get A Smooth Finish On Furniture


How To Get A Smooth Finish On Furniture


Application of the paint is much easier when it is watered down.   When I painted my MESSY YELLOW DESK, I did not water down my paint.   One stroke into it and I was dreading how much time it was going to take me to paint the whole thing!  Not to mention the thick brush strokes that I couldn't get rid of. Thus the reason why I did the messy paint job.   It was easier that way (and looked cool).

I even water down my chalk paint.  You sort of have to, otherwise it gets really thick.  Notice how the paint just runs off the spoon like water?   You can't do that with paint that isn't watered down.

I never do exact measurements of water to paint.   I just add a little water, stir, and continue to add water until I get the consistency I want.   If it runs like the above picture -- it's ready.   

October 8, 2013

DIY Heart Picture Frame

Recently I posted about my Simple Table Confetti. Not only was that project simple and cheap, but there was another project that accidentally came out of it.  

This little heart picture frame -- isn't it darling?

DIY Heart Picture


So now, this little heart picture frame can go a few ways for me. One - it will look cute at my wedding along with my DIY Simple Table Confetti's.  Two - it just looks cute on my TV stand.  Three - it will be the perfect decor for Valentine's Day!

DIY Heart Picture


Just a quick recap of how I put this thing together. 

Things You Will Need
Frame
Decorative Paper (I used old music sheets)
Card Stock
Scissors
Mod Podge

1. - Read here on how to get your heart cut paper. 
2. - Cut your heart paper and card stock to fit your frame.
3. - Use Mod Podge to glue the heart cut paper to your card stock.
4. - Finish by cutting it down to fit perfectly into your frame.


Easy peasy!! Now I have more confetti to do, so I will have more of these picture frames to do also.  All FREE using materials I already had. LOVE! 

September 28, 2013

Red Painted (and Stained) Dresser Redo

This cute red painted dresser wasn't always so pretty. In fact, she was really scary when we picked her up (for only $15 through craigslist.) You can read about that thrifty day here.  I will spare you the gory details today but think lots of cob webs and a bad odor.

Red Painted Dresser


Right away I knew her home was going to be in my living room, underneath my TV :)

At first, there was some flack about whether or not this was going to be the best choice of color for the space.  Butttt....it looks really nice and I'm glad I kept with my vision for the piece!

How did I do this transformation? Keep reading to find out!!!


I had a small pot of red paint I wanted to use but I knew it wouldn't be quite enough.  So I mixed a tad of white paint with it.  Of course what we have here is a pink dresser.  Now THAT would have been a bad choice for my living room :)


But once she was dry, I took a rag and some wood stain and got down to business turning that pink into a deep rustic look.  This part is pretty fun and not as near as hard as distressing with sandpaper.  Can you tell the difference after the stain? 

Here is what I used.
Just a bunch of old paint and stain I had laying around.  I'm pretty happy this stuff is getting used up.  I think I've been storing it for two years! 


The Mr worked his carpentry magic and made some shelves for the two drawers I was taking out.  This stuff is pretty cheap at your local Menards or Home Depot.


He also drilled out the holes for my new hardware. Without this guy I would get nowhere with my furniture projects...no joke!


And....here is my new TV stand.  I absolutely love this thing. There is a ton of space to store DVDs, remotes, and other electronic accessories.  

The hardware was purchased at Hobby Lobby -- and the most expensive part of this project.  Totally worth it though.

Stay tuned for a future post on what I did with the two drawers I removed :)